When a storm hits unexpectedly or a sudden leak appears, every second counts. A well-prepared homeowner knows that having an emergency roof kit on hand can be the difference between a minor inconvenience and thousands of dollars in water damage.
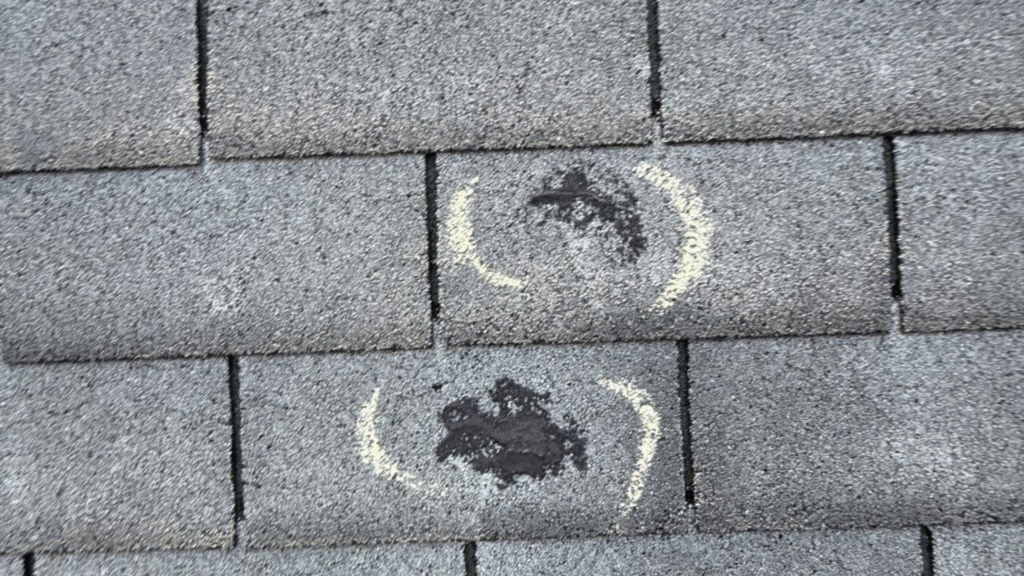
Roof emergencies often strike without warning — a branch punctures your shingles, hailstones bruise your roof surface, or wind-driven rain finds its way under flashing. In these moments, waiting for professional help isn’t always an option. That’s where an emergency roof kit comes in: it allows you to take temporary, effective action to stop leaks fast and protect your home until a qualified roofing contractor like Whitt Roofing & Restoration can arrive.
In this comprehensive guide, we’ll walk you through everything you need to know about building and using an emergency roof kit — what to include, how to use each item, and the most common mistakes to avoid when tackling leaks under pressure.
Why Every Home Needs an Emergency Roof Kit
Roof Emergencies Can Happen Anytime
Ohio weather can be unpredictable — sunny skies one day, severe thunderstorms or snow the next. High winds, hail, heavy rain, and ice can all cause unexpected roof damage. When that happens, leaks can start spreading within minutes, leading to soaked insulation, damaged drywall, electrical hazards, and mold growth.
Waiting for a roofer during a regional storm surge can take hours or even days. That’s why homeowners in Marengo and Mount Vernon, OH, should prepare in advance with a reliable emergency roof kit. It’s your first line of defense to minimize damage and protect your investment until permanent repairs can be made.
What an Emergency Roof Kit Is — and Isn’t
An emergency roof kit is not meant to replace professional roof repair. Instead, it’s designed for temporary fixes to stop or slow leaks, secure loose shingles, and prevent water from entering your home. Think of it as your home’s first aid kit — a set of essential tools and materials that allow you to take immediate action in an emergency.
The Benefits of Being Prepared
- Minimize damage: Stop leaks before they reach interior walls and ceilings.
- Save money: Prevent secondary damage that leads to expensive repairs.
- Protect insurance claims: Acting quickly can strengthen your claim and show due diligence.
- Peace of mind: Knowing you can act immediately reduces stress during a storm.
- Safety: A ready-to-use kit helps you avoid makeshift, unsafe repair attempts.
When roof emergencies happen, preparedness is power.
The Essential Tools for Your Emergency Roof Kit
A strong emergency roof kit begins with the right tools. These allow you to safely access your roof, make quick repairs, and contain the problem before it spreads.
1. Heavy-Duty Tarp (10×12 ft or larger)
A high-quality tarp is the cornerstone of every emergency roof kit. It provides an immediate waterproof barrier to stop leaks and protect exposed areas. Choose a polyethylene or vinyl-coated tarp that’s thick (10–12 mil) and UV-resistant.
How to use it:
- Lay the tarp over the damaged section, extending it at least 3 feet past the affected area.
- Secure it tightly with nails, sandbags, or 2x4s screwed into the roof decking.
- Always start from the ridge and work your way down to ensure proper drainage.
Pro Tip: Avoid thin blue tarps — they tear easily and won’t hold up against strong winds.
2. Roofing Nails and a Hammer
Nails (1¼–1½ inch galvanized) and a hammer are essential for securing tarps or loose shingles. Always use galvanized nails to prevent rust and ensure the fasteners hold in damp conditions.
If you have a roofing nail gun, include extra nails and a small compressor in your kit — it’ll make securing materials faster and more reliable during an emergency.
3. Utility Knife and Extra Blades
A sharp utility knife is necessary for cutting tarps, shingles, or roofing cement patches to size. Keep several replacement blades sealed in a waterproof container.
4. Ladder (with stabilizer)
You can’t access your roof without a safe ladder. A fiberglass extension ladder with stabilizer bars or hooks is ideal for roof access. Always place it on solid ground and have someone hold it steady.
If climbing the roof is unsafe due to height, steepness, or weather, don’t risk it — focus instead on indoor leak containment until professionals arrive.
5. Work Gloves and Non-Slip Boots
Roof work requires solid grip and protection. Use heavy-duty rubber-coated gloves and non-slip rubber boots or shoes with deep tread to reduce your risk of slipping.
6. Headlamp or Flashlight (with extra batteries)
Roof leaks often occur at night or during storms when visibility is low. A waterproof LED headlamp allows you to keep both hands free while inspecting and repairing damage. Always pack extra batteries in your emergency roof kit.
7. Safety Harness and Rope
If you must go on the roof, use a roof safety harness system anchored securely to the ridge. Falls are one of the most common and deadly household accidents — so never skip safety gear.
Pro Tip: Attach a 5,000-lb rated anchor with a carabiner and lanyard to prevent falls on steep or slick roofs.
The Essential Materials for Temporary Roof Repairs
Once you have your basic tools, you’ll need materials to perform temporary repairs. These items are designed to stop leaks fast and protect the roof deck from further deterioration.
1. Roofing Cement or Sealant
This thick, waterproof adhesive can patch cracks, small holes, or lifted shingles. Choose a high-grade asphalt-based roofing cement or a polyurethane sealant for stronger adhesion in wet conditions.
How to use it:
- Clean the surface of debris or water.
- Apply the cement generously to seal cracks, flashing gaps, or nail holes.
- For larger leaks, use cement to adhere a shingle or piece of roofing fabric over the area.
Tip: Store your roofing cement in a sealed plastic bag inside your kit to prevent hardening.
2. Roofing Tape or Patch Rolls
Peel-and-stick roofing tape or patch rolls (like EternaBond) are great for sealing seams, vents, or punctures. These products provide a strong, waterproof bond even in damp conditions.
Use them for:
- Cracked flashing
- Skylight edges
- Damaged seams on metal or flat roofs
3. Spare Shingles or Metal Patches
Keep several extra shingles, ridge caps, or small metal patches matching your roof’s material. This allows for quick replacements if a few shingles are blown off.
If you have a metal or rubber roof, include scrap pieces of the same material for temporary patching.
4. Roofing Nails and Washers
Include a small box of neoprene washer nails — these have rubber gaskets that seal around the nail hole, preventing leaks. They’re especially effective for temporary tarp installations.
5. Plastic Sheeting and Duct Tape
Plastic sheeting (4–6 mil thickness) can provide an extra layer of protection under a tarp or over ceiling leaks indoors. Combined with industrial duct tape, it’s perfect for sealing small cracks, holes, or seams.
6. Roof Underlayment (Optional)
For homeowners comfortable with basic repairs, keeping a small roll of roofing underlayment or felt on hand allows you to add an additional water-resistant layer before installing a tarp.
7. Caulk Gun
A caulk gun is useful for applying sealants precisely along flashing, vents, and ridges. It’s a must-have for sealing hard-to-reach or narrow spots where roofing cement may be too thick.
8. Plywood Sheets (for large damage)
If severe storms rip off shingles or decking, temporary plywood sheets can cover exposed areas. Always secure them with nails or screws and seal the edges with roofing cement or tape.
Safety Tip: Avoid working during lightning, heavy rain, or strong winds. If conditions are unsafe, focus on minimizing indoor water intrusion until professionals can arrive.
How to Use Your Emergency Roof Kit (Step-by-Step)
Having an emergency roof kit is one thing — knowing how to use it properly is another. Below is a simple, step-by-step process to help you handle roof leaks safely and effectively.
Step 1: Stay Safe and Assess the Situation
Before grabbing your ladder, take a moment to evaluate:
- Is the storm still active?
- Is lightning nearby?
- Are winds too strong for roof work?
If conditions are dangerous, do not climb the roof. Instead, control the leak from inside by placing buckets under drips and using towels or plastic sheeting to protect valuables.
Once it’s safe, perform a visual inspection from the ground or attic. Look for signs of damage: missing shingles, sagging areas, or visible sunlight through decking.
Step 2: Contain the Interior Leak
Inside your home:
- Move furniture and electronics away from leak areas.
- Place buckets or large containers under drips.
- Use towels or plastic sheets to protect flooring.
- Puncture bulging ceiling paint gently to release trapped water (place a bucket beneath first).
This step minimizes interior damage while you prepare for outdoor work.
Step 3: Locate the Source of the Leak
Climb safely using a ladder with stabilizers. Most leaks originate from:
- Missing or lifted shingles
- Damaged flashing near chimneys or vents
- Clogged gutters or downspouts
- Roof valleys with pooling water
If you can’t identify the source, cover the general area of the suspected leak — most emergency tarps will still protect the interior.
Step 4: Secure the Damaged Area
Use your tarp, nails, and 2x4s to cover the damaged section:
- Lay the tarp flat across the roof, ensuring it extends at least 3 feet beyond damage on all sides.
- Wrap the tarp’s edges around 2×4 boards and nail them down to prevent tearing.
- Use additional boards or sandbags to weigh the tarp in place.
If you have roofing cement or tape, seal visible cracks or punctures before laying the tarp for added waterproofing.
Step 5: Call a Professional Roofing Contractor
Once the immediate damage is contained, contact a licensed professional for a full inspection. Companies like Whitt Roofing & Restoration specialize in emergency roof repair and can assess whether your roof needs a patch, partial replacement, or a full rebuild.
Document the damage before cleanup — take clear photos and videos for your insurance claim.
Why Choose Whitt Roofing & Restoration for Roof Emergencies
When a roof emergency strikes, you need more than just the right tools — you need a team you can trust. Whitt Roofing & Restoration is proud to serve homeowners in Marengo and Mount Vernon, Ohio, offering rapid, reliable roofing solutions when you need them most.
1. Fast Emergency Response
We understand that roof leaks can’t wait. Our team provides 24/7 emergency service, ensuring your home stays safe and dry even during Ohio’s toughest weather conditions.
2. Expert Roof Inspections and Documentation
We go beyond temporary fixes — our detailed inspections identify the root cause of the problem and provide thorough documentation for insurance claims. That means less stress and faster approvals for you.
3. Local Knowledge and Trusted Reputation
As a locally owned and operated company, we know the unique weather challenges homeowners face in Central Ohio — from hailstorms to snow loads. Our reputation for honesty, quality workmanship, and customer care has made us one of the area’s most trusted roofing experts.
4. Complete Restoration Services
From emergency roof repair to full roof replacement, siding restoration, and storm damage cleanup, Whitt Roofing & Restoration handles every step of the process. We use premium materials and proven techniques to ensure your home stays protected long-term.
5. Commitment to Safety and Integrity
Your safety and satisfaction come first. We use proper safety gear, follow local building codes, and provide upfront pricing — no surprises, no shortcuts, just reliable service you can depend on.
Final Thoughts
Having an emergency roof kit ready before a storm can make all the difference when minutes matter most. By keeping the right tools, materials, and safety gear on hand, you can stop leaks quickly, protect your property, and buy valuable time until professionals arrive.
Remember: an emergency roof kit is about preparation, not replacement. It’s your bridge between crisis and repair — helping you safeguard your home, your belongings, and your peace of mind.
If you ever experience storm damage, leaks, or other roofing emergencies in Marengo or Mount Vernon, OH, don’t wait. Contact Whitt Roofing & Restoration for prompt, professional help you can trust.
Call today to schedule your roof inspection or emergency repair service — and keep your home safe from whatever Ohio weather throws your way.