A leaking roof can cause instant stress for any homeowner. Whether you live in Marengo, Mount Vernon, or anywhere in central Ohio, discovering water dripping into your home during a storm or after a windy day is a moment no one wants to face. But here’s the reality: leaks rarely wait for a convenient time, and professional help isn’t always immediately available.
That’s where knowing how to handle a DIY emergency roof fix comes in handy. While these temporary solutions won’t replace the skill of a licensed roofing contractor, they can save you from extensive water damage until professional repairs are made.
In this in-depth guide, we’ll walk you through everything you need to know about managing leaks, protecting your home, and making smart decisions about when to call in the pros.
Why Roof Leaks Happen in the First Place
Before diving into how to perform a DIY emergency roof fix, it helps to understand why leaks occur. Roof systems are designed to protect your home from harsh weather, but time, environment, and materials all play a role in their vulnerability.
Common Causes of Roof Leaks:
- Damaged or Missing Shingles
Strong winds and heavy rain in Ohio can rip shingles loose, leaving your roof exposed to water infiltration. - Clogged Gutters
When gutters overflow, water can back up under the roofing materials and cause leaks. - Cracked Flashing or Sealant
Flashing around chimneys, vents, and skylights often deteriorates over time, creating small gaps for water to sneak through. - Ice Dams in Winter
Melting snow refreezes at roof edges, pushing water back under shingles. - Aging Roof Materials
Even with regular maintenance, most asphalt shingle roofs last about 20–25 years. Beyond that, leaks become increasingly common. - Improper Installation
A poorly installed roof is much more likely to develop leaks sooner than expected.
Understanding the root cause of leaks helps you apply the right short-term fix and gives your roofing contractor critical information for permanent repair later.
First Steps to Take When You Notice a Leak
When water starts dripping into your living room or you see a wet spot spreading across your ceiling, your first instinct may be panic. But taking calm, immediate steps can minimize damage.
Step 1: Protect the Interior of Your Home
- Move furniture, electronics, and valuables away from the leak.
- Place a bucket or container under the drip to catch water.
- Lay towels or tarps to protect your flooring.
Step 2: Relieve Water Pressure
If water is pooling in a bulge on your ceiling, use a screwdriver to puncture a small hole in the center. This relieves pressure and prevents the entire ceiling from collapsing.
Step 3: Locate the Source
Leaks are often deceptive. Water may enter at one point on the roof but travel along rafters before dripping inside. Safely check your attic with a flashlight to identify wet spots or dripping water.
Step 4: Contain the Damage
Once you’ve located the problem area, you can move forward with a DIY emergency roof fix to stop the water intrusion until a roofing professional can inspect.
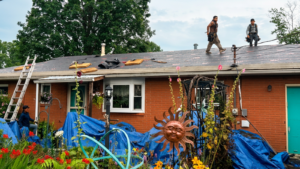
How to Perform a DIY Emergency Roof Fix
Performing a DIY emergency roof fix is about stabilizing the situation, not providing a permanent solution. Safety must always come first. If conditions are too dangerous—such as climbing a slick roof during heavy rain—stay inside and call a professional.
Option 1: Use a Tarp
A tarp is one of the quickest and most effective temporary fixes.
- Cut a tarp large enough to cover the damaged area, extending several feet past the leak.
- Secure it with 2×4 boards nailed or screwed into the roof (only if conditions allow).
- Ensure edges are tucked tightly to prevent water from seeping under.
Option 2: Roofing Cement or Sealant
For small cracks or gaps around flashing or vents, roofing cement can provide a short-term seal.
- Clean the area as best as possible.
- Apply roofing cement generously over the crack.
- Smooth with a putty knife to ensure coverage.
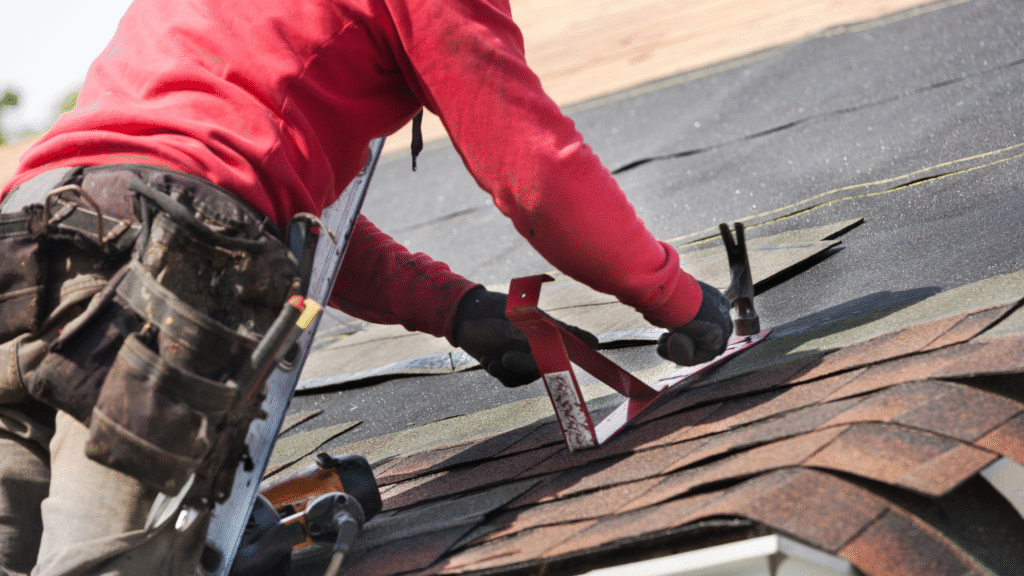
Option 3: Replace a Missing Shingle
If a shingle has blown off and you have extras stored, you can temporarily replace it.
- Slide the new shingle into place.
- Secure it with roofing nails and a dab of roofing cement.
- Seal edges to keep water out.
Option 4: Create an Attic Patch
If you can’t safely access the roof, place plywood or heavy plastic sheeting inside the attic beneath the leak. This redirects water into a bucket while reducing interior damage.
Option 5: Emergency Roof Tape
Special waterproof tapes are available at hardware stores and can be used to seal minor cracks until a roofer arrives.
Each of these methods provides short-term relief, but remember: a DIY emergency roof fix is not a long-term repair. Always follow up with a professional inspection.
Mistakes to Avoid with DIY Emergency Roof Fixes
While DIY fixes can be a lifesaver in the moment, they can also create bigger problems if done incorrectly.
Mistake #1: Working in Unsafe Conditions
Climbing on a wet, steep roof can be dangerous. If weather conditions are unsafe, stay inside.
Mistake #2: Using Low-Quality Materials
Thin plastic or weak adhesives won’t hold up in heavy rain or wind. Always use heavy-duty tarps, roofing cement, or specialized tapes.
Mistake #3: Ignoring the Underlying Issue
A tarp may stop water temporarily, but it won’t solve deteriorating flashing or missing shingles. Never assume your temporary fix is permanent.
Mistake #4: Delaying Professional Help
The longer you wait to schedule professional repair, the greater your risk of long-term damage. Mold, rot, and structural issues develop quickly.
Mistake #5: Voiding Your Warranty
Attempting extensive DIY work without proper knowledge may void your roof’s warranty. Keep receipts and documentation for any materials used until a pro can take over.
The best strategy is to use your DIY emergency roof fix to protect your home for the moment, then immediately schedule a professional inspection.
Why Choose Whitt Roofing & Restoration in Marengo & Mount Vernon, OH
At Whitt Roofing & Restoration, we know roof leaks don’t wait for business hours. Our team is here to provide fast, professional service when you need it most. Here’s why homeowners across Knox and Morrow counties trust us:
Local Expertise
We understand the unique weather challenges in central Ohio, from summer storms to winter ice dams. Our roof inspections and roof repairs are tailored to the conditions your roof faces.
Rapid Emergency Response
We know a leak is urgent. Our team is committed to fast service that minimizes water damage and restores your peace of mind.
Professional, Long-Term Solutions
While a DIY emergency roof fix may buy you time, our licensed, insured professionals provide permanent repairs that protect your home for years.
Transparent Pricing
We provide clear estimates, so you know exactly what to expect—no surprises, just honest service.
Commitment to Quality
From the smallest shingle repair to a full roof replacement, our mission is to deliver superior workmanship and exceptional customer care.
When you call Whitt Roofing & Restoration, you’re choosing a team that cares about your home as much as you do.
Final Thoughts
Leaks can be overwhelming, but with preparation and knowledge, you can take control of the situation. A DIY emergency roof fix can save you from costly water damage while you wait for professional help, but remember—it’s only the first step.
If your roof is leaking in Marengo, Mount Vernon, or the surrounding Ohio communities, don’t wait. Contact Whitt Roofing & Restoration today for professional service that keeps your home safe, dry, and secure.